How to Level a Raised Garden Bed on Uneven Ground
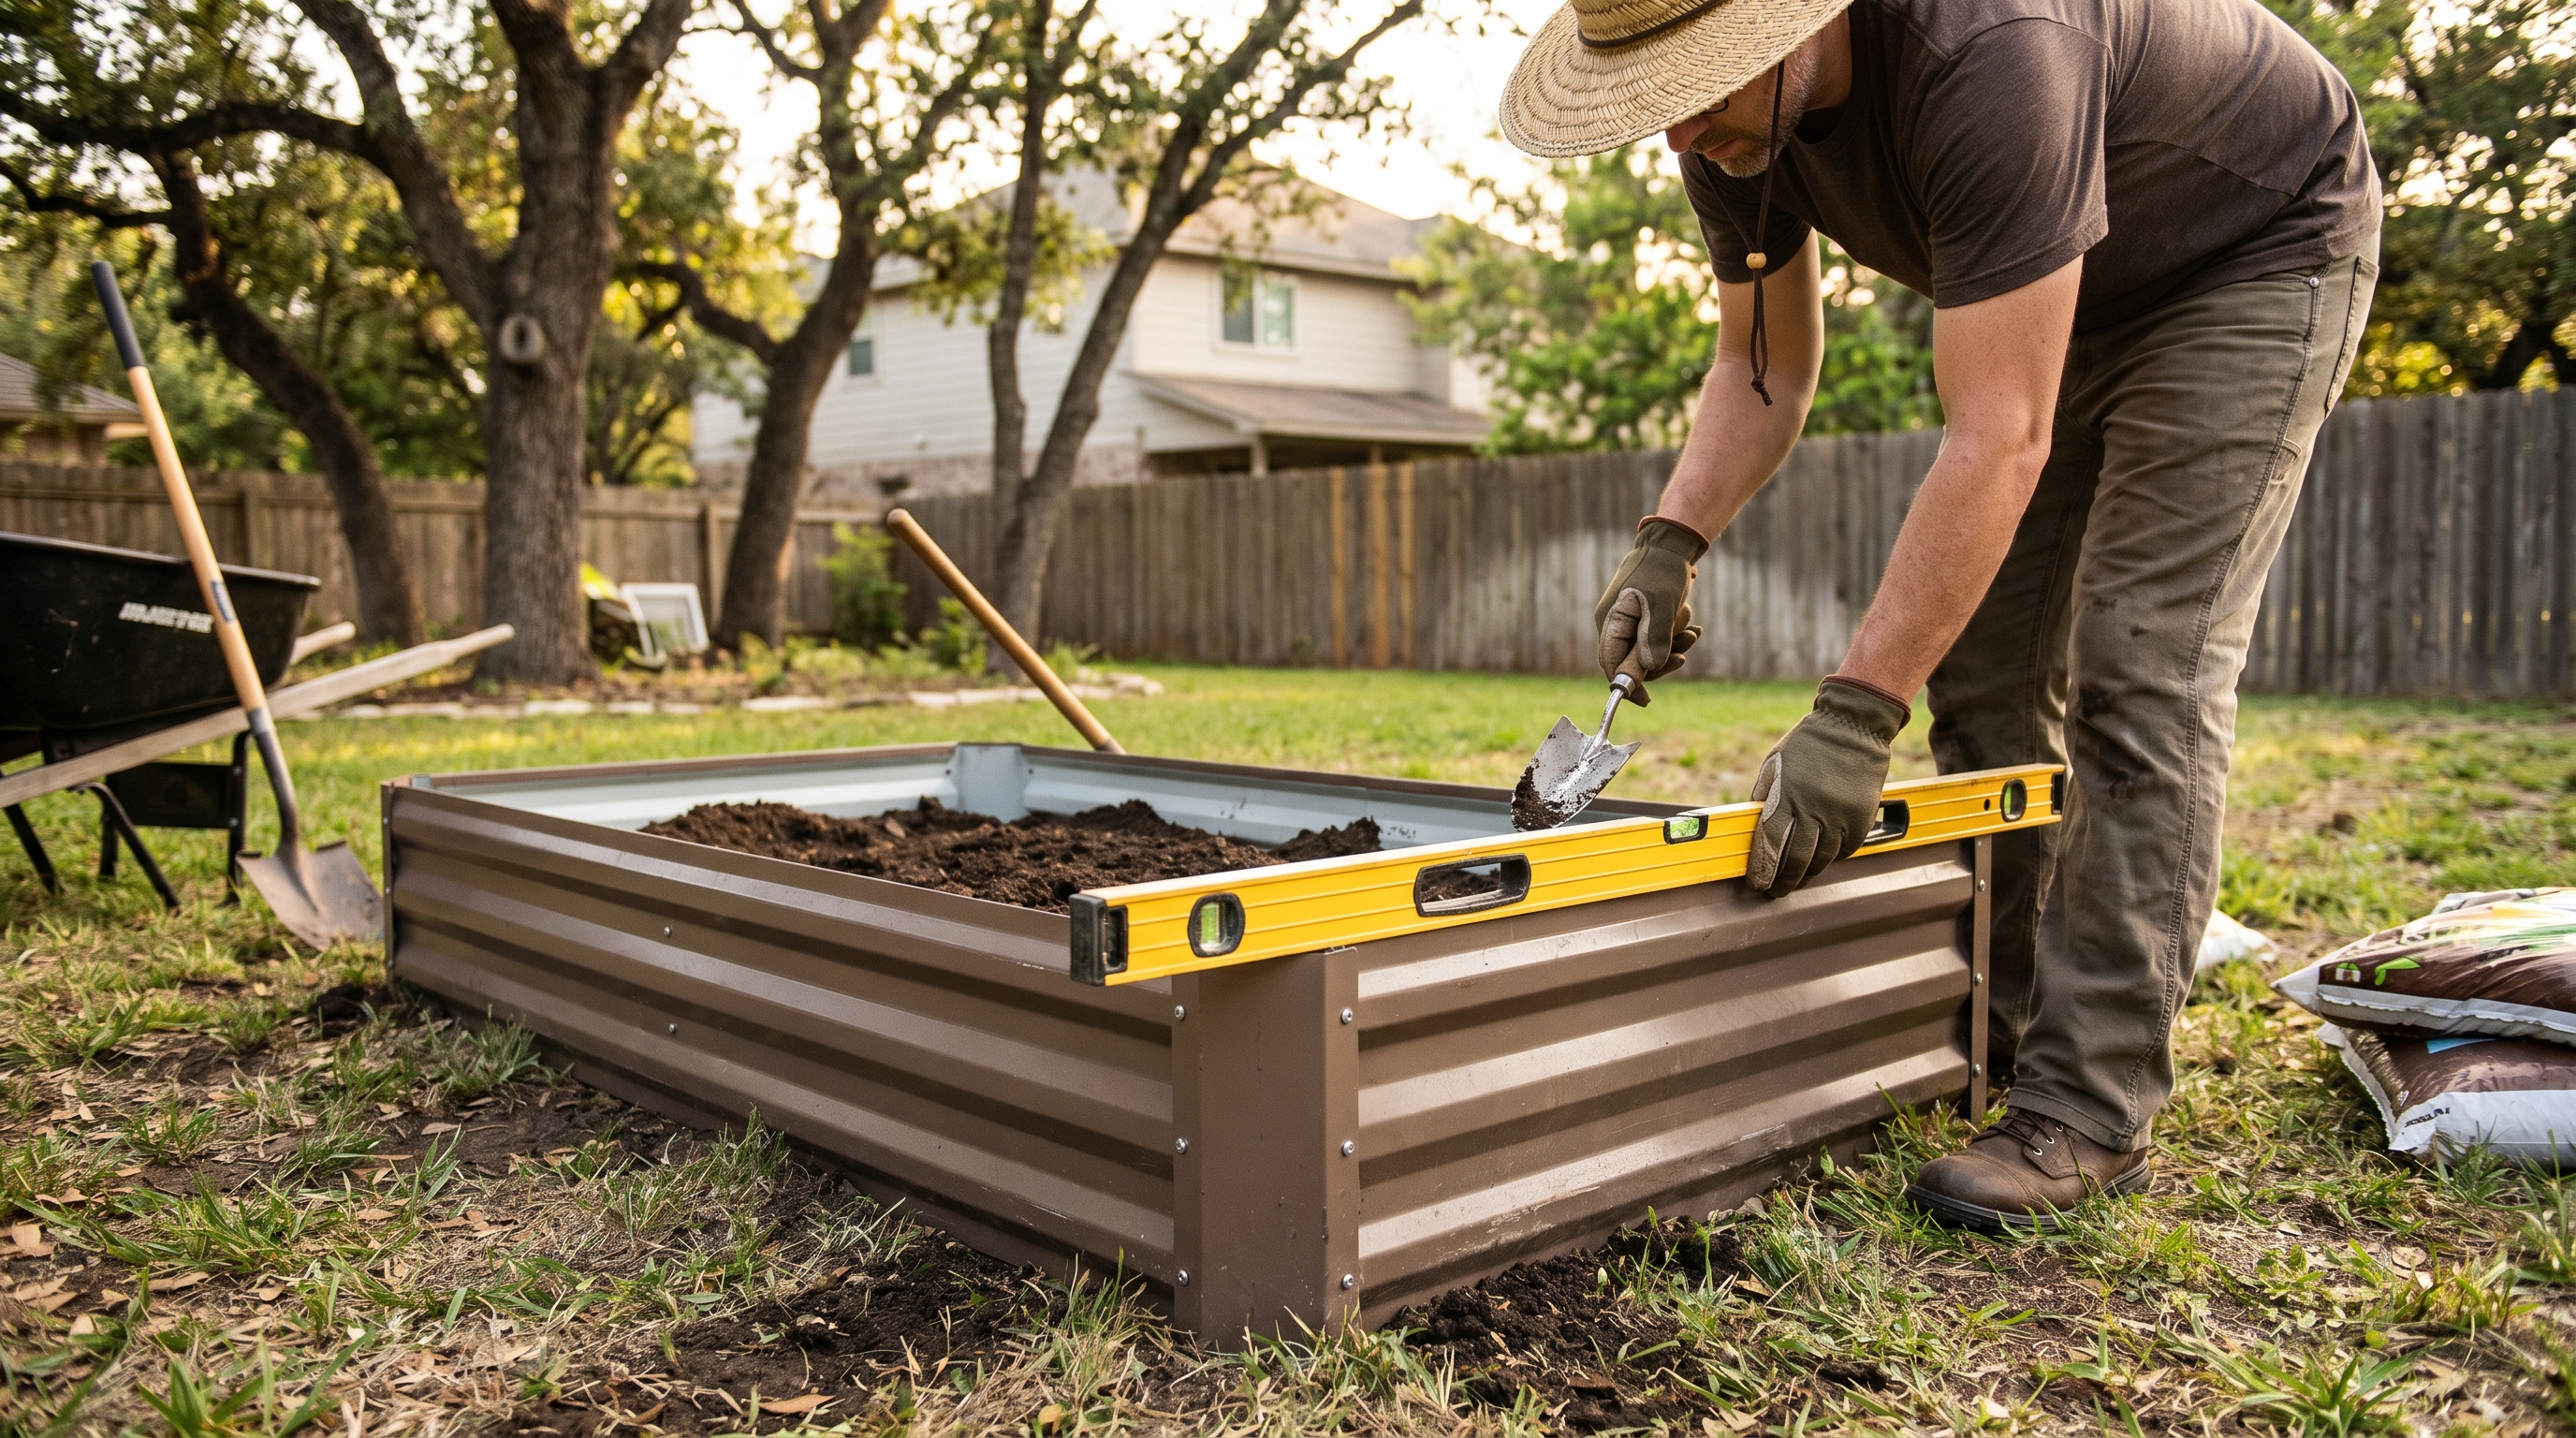
ALT: Gardener leveling a metal raised garden bed on uneven ground in a residential backyard garden
Why Leveling Your Raised Garden Bed on Uneven Ground Matters More Than You Think
Key Conclusion: A properly leveled raised garden bed is the foundation of a productive, long-lasting garden. Whether you’re working with a gentle slope or genuinely uneven terrain, taking the time to level your raised bed garden layout correctly prevents water pooling, soil erosion, and structural instability. Getting this step right from the beginning protects your investment, improves plant health, and ensures your raised bed planting layout performs season after season for years to come.
If you’ve ever set up a raised garden bed only to watch water drain off to one side, watch soil shift toward a corner, or notice your plants tilting at an odd angle, you already understand the real-world consequences of an unlevel bed. Leveling isn’t just an aesthetic concern—it directly affects drainage patterns, root development, and the structural integrity of the bed walls themselves. The good news is that leveling a raised garden bed on uneven ground is a manageable DIY task with the right approach, tools, and understanding of your specific terrain. Whether you’re a first-time gardener setting up your initial raised bed layout or an experienced grower expanding an established garden, this guide walks you through every practical step.
Who This Guide Is For (and When Leveling Is Essential)
✅ Applicable Scenarios:
- Homeowners installing raised garden beds on naturally sloped or rolling backyard terrain
- Urban and suburban gardeners working with compacted, uneven soil or patchy lawns
- Empty nesters or retirees converting yard space into productive kitchen gardens on imperfect ground
- Gardeners upgrading from in-ground planting to a raised bed system on hillside or terraced yards
- Anyone setting up taller or extra-tall raised beds where stability is critical
❌ Not Applicable/Cautions:
- Beds installed on perfectly flat, pre-leveled concrete or patio surfaces (leveling work is already done)
- Container gardening on balconies or elevated decks with adjustable platform systems
- Slopes steeper than 30 degrees, where full terracing or retaining wall construction is a better structural solution than simple bed leveling
- Situations where underground utility lines or tree roots are present—always check before digging
Understanding Why Uneven Ground Is Such a Common Challenge for Raised Bed Gardeners
Most residential yards in North America are anything but perfectly flat. Natural landscaping, grading for drainage, tree root systems, and decades of soil settling all contribute to terrain that looks manageable at a glance but reveals its complexity the moment you try to place a rectangular garden bed on it. According to the University of California Cooperative Extension, proper site preparation—including leveling—is one of the most important factors in raised bed performance and longevity.
The challenge is compounded by the fact that raised garden beds come in many sizes and heights. A low-profile 18-inch bed on a mild slope may seem stable initially, but over a season of rain and watering, unlevel placement leads to predictable problems: uneven moisture distribution, concentrated soil compaction on the downhill side, accelerated wear on one wall of the bed frame, and in some cases, complete structural failure.
For taller beds—those in the 24-inch to 35-inch extra-tall or waist-high range—the problem is even more pronounced. A taller column of soil exerts significantly more lateral pressure on the walls, and any tilt amplifies that force unevenly. This is why professional gardeners and landscape designers consistently emphasize leveling as a non-negotiable first step before filling a bed with soil.
At Anleolife, we’ve designed our galvanized steel and rust-resistant raised garden beds to last up to 20 years, but even the most durable, well-engineered bed will underperform if it’s sitting on improperly prepared ground. The structural integrity of the frame, the drainage behavior of your soil mix, and the health of your plants all depend on that foundational level surface.
The good news: leveling uneven ground for a raised garden bed doesn’t require heavy equipment or professional landscaping services in most cases. With the right knowledge, a few basic tools, and a methodical approach, it’s a project most gardeners can complete in a weekend afternoon.
How to Level a Raised Garden Bed on Uneven Ground: Step-by-Step Solutions
Three-Step Quick Start
Step 1: Assess Your Terrain and Choose Your Leveling Strategy
Before picking up a shovel, spend 15–20 minutes thoroughly evaluating your site. Use a long carpenter’s level or a line level and string to measure how much your ground varies across the footprint of your planned bed. Note whether the slope runs lengthwise, crosswise, or diagonally. Record the highest and lowest points—this measurement tells you whether you’re dealing with a minor correction (under 2 inches) or a more significant grade change that requires additional material or excavation. Your terrain assessment directly determines which of the three primary leveling methods you’ll use.
Step 2: Prepare the Ground Using Your Chosen Method
Once you know your slope, execute your leveling approach systematically. For minor slopes, this means cutting into the high side and building up the low side with compacted fill material. For moderate to significant slopes, you may need to create a tiered or stepped foundation using landscape timbers, gravel beds, or a combination of both. Always compact fill material in layers—never add more than 2–3 inches of loose material at a time before tamping. This prevents future settling that would re-create the uneven surface you just corrected. Plan for this step to take 1–3 hours depending on terrain severity.
Step 3: Place, Check, and Anchor Your Raised Bed
With your prepared surface ready, position your raised garden bed carefully. Use a bubble level across multiple points—both the long sides, the short sides, and corner-to-corner diagonals—to confirm true level in all directions. Make small adjustments by adding or removing material under specific points of the frame. Once level is confirmed, stake or anchor the bed according to the manufacturer’s recommendations, add your landscape fabric liner if desired, and begin filling with your soil mix in layers to avoid shifting the frame during fill.
Comparing the Three Main Leveling Methods
Different terrain conditions call for different solutions. Here’s a practical comparison of the three most common approaches gardeners use to level raised beds on uneven ground:
| Comparison Dimension | Cut-and-Fill Method | Gravel Base Method | Stacked Frame/Riser Method |
|---|---|---|---|
| Best For | Mild to moderate slopes (1–4 inches variance) | Moderate slopes with poor drainage | Steep slopes or very uneven terrain |
| Skill Level Required | Beginner to intermediate | Beginner | Intermediate |
| Primary Materials | Soil, fill dirt, tamping tool | Gravel, landscape fabric, level | Additional frame sections or riser boards |
| Drainage Performance | Good if done correctly | Excellent | Excellent |
| Time Investment | 1–3 hours | 2–4 hours | 2–5 hours |
| Cost Level | Low | Low to moderate | Moderate |
| Long-term Stability | Good on compacted native soil | Very good | Very good to excellent |
| Best Bed Height Range | 18-inch standard beds | All heights | 24-inch and taller extra-tall beds |
Each of these methods can be used with any of Anleolife’s raised garden bed configurations, and in practice, many gardeners combine elements from multiple approaches for the best results.
Detailed Method Breakdown: What to Actually Do on the Ground
The Cut-and-Fill Method: Simple and Effective for Most Yards
The cut-and-fill method is the most straightforward approach and works well for the majority of residential yards with gentle to moderate slopes. The core principle is simple: remove soil from the high side of your bed’s footprint and use it (or additional compactible fill material) to build up the low side until the entire footprint is level.
Start by outlining the exact footprint of your bed using stakes and string. Use your line level to identify the highest corner—this becomes your reference point. All other points need to be raised to match this height. Dig down on the high side, removing topsoil carefully (you can reuse it in your bed later). On the low side, add fill material in 2–3 inch layers, tamping firmly with a hand tamper or plate compactor between each layer.
One practical tip: use a long straight board (2×4 works well) laid across the footprint with a bubble level on top to check level repeatedly as you work. Checking at multiple angles—lengthwise, crosswise, and diagonally—ensures you catch any twist in the surface, not just one-directional slope.
For Anleolife’s standard 18-inch raised beds in larger footprints like the 12×3 or 8×4 configurations, this method typically takes an afternoon and produces excellent results. The key is patience with the compaction process—rushing it leads to settling within the first growing season.
The Gravel Base Method: Superior Drainage Meets Stability
When your yard has both uneven terrain and known drainage challenges, the gravel base method solves two problems simultaneously. Rather than working exclusively with native soil, you excavate the entire bed footprint to a consistent depth (typically 4–6 inches below your lowest reference point), then fill this excavated area with compacted gravel to create a perfectly level, highly permeable base.
Begin by excavating the footprint uniformly. Lay landscape fabric on the excavated floor to prevent weed intrusion and soil migration into the gravel layer. Add coarse gravel (3/4-inch crushed stone works well) in layers, checking level constantly with your board and bubble level. Once your gravel base is level and fully compacted, place your raised bed frame directly on top.
This method is particularly well-suited to Anleolife’s taller beds—the 24-inch extra-tall and 30-inch extra-tall configurations—because the gravel base provides excellent drainage for the deeper root zones these beds support, while also creating a rock-solid, stable foundation. The gravel also naturally discourages burrowing pests from entering the bed from below.
The Stacked Frame or Riser Method: Elegant Solutions for Challenging Terrain
For more dramatic slope changes or genuinely challenging terrain, the stacked frame or riser method takes a different philosophical approach: instead of making the ground perfectly level, you adapt the bed’s foundation to accommodate the terrain while keeping the top of the bed level.
In practice, this often means using landscape timbers, treated lumber, or concrete blocks on the downhill side to raise that edge of the frame until it matches the height of the uphill side. The frame itself sits level even if the ground underneath it isn’t. The cavity between the bottom of the raised frame section and the ground is typically filled with gravel for stability and drainage.
This approach works beautifully on terraced hillside gardens and is frequently used by empty nesters and retirees who want to establish productive garden areas on sloped properties without undertaking major landscaping projects. It also pairs naturally with Anleolife’s modular raised garden bed systems, which are designed with flexibility in mind, allowing gardeners to configure and expand their growing space as their needs evolve.
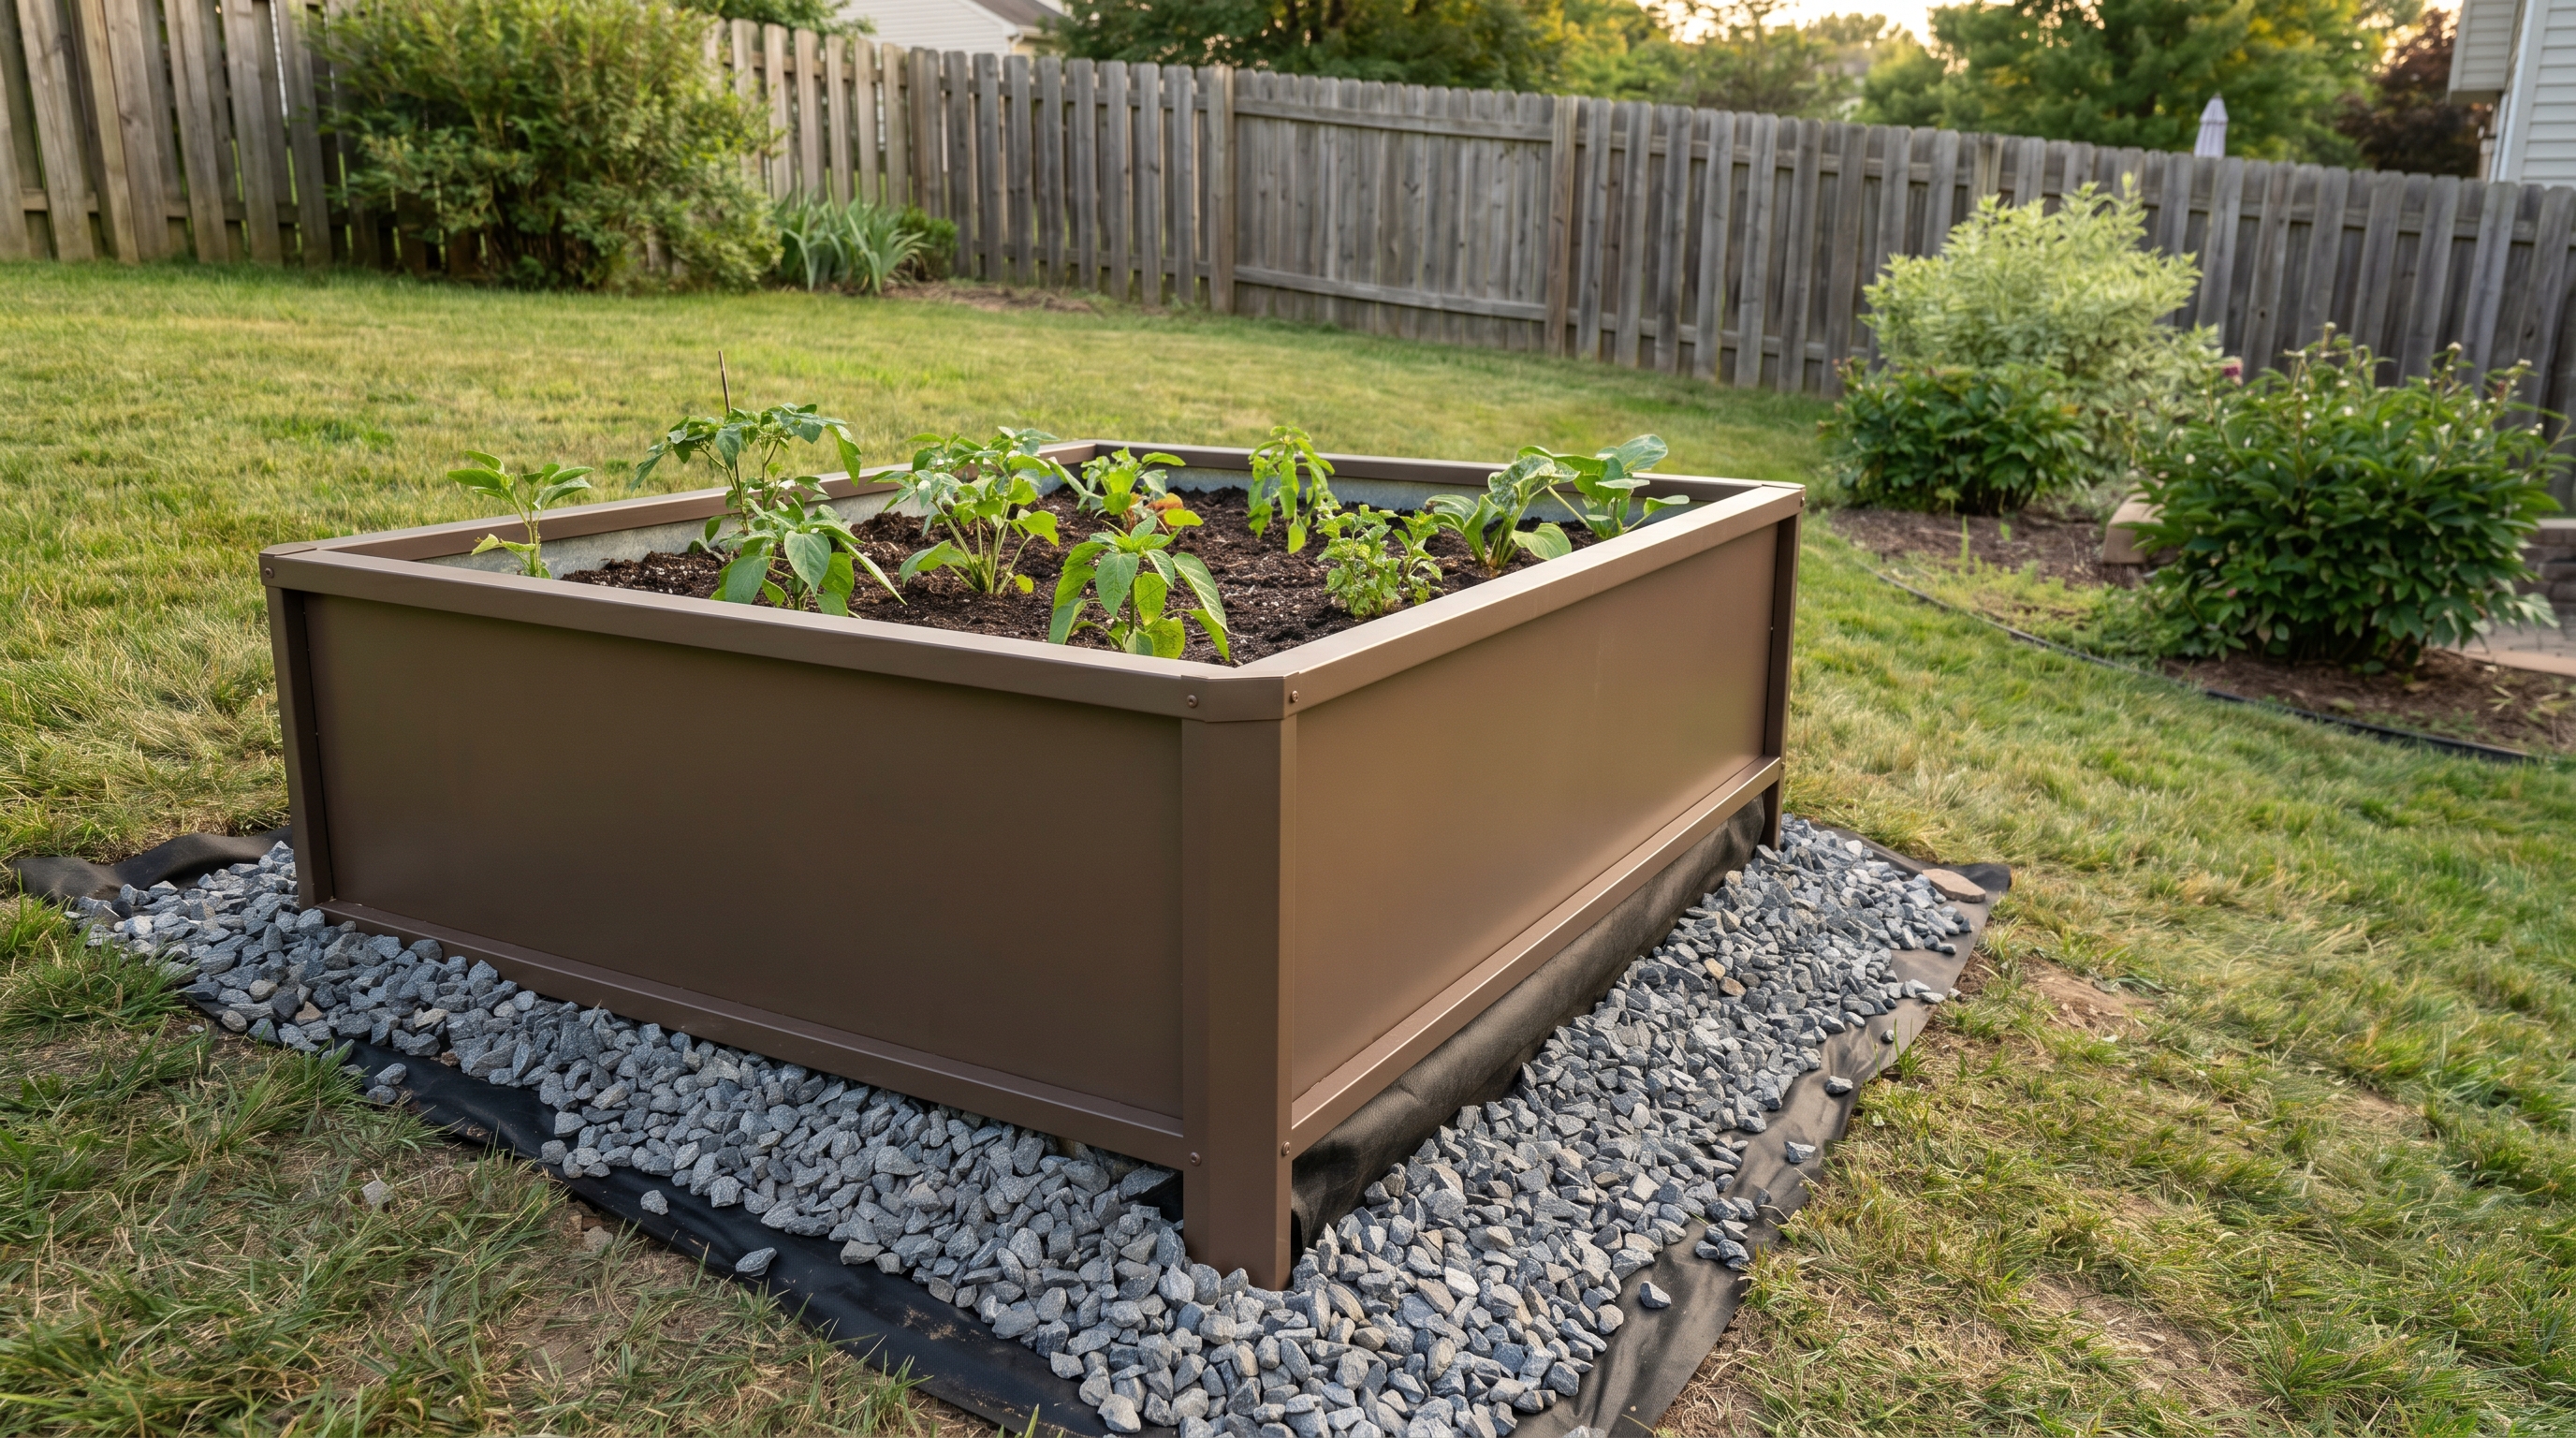
ALT: Galvanized steel raised garden bed installed level on uneven sloped ground using gravel base leveling method in a residential backyard garden
Advanced Considerations: Handling Special Situations and Common Misconceptions
When Your Slope Is Steeper Than Expected
If you discover mid-project that your slope is more significant than initial assessment suggested, don’t push through with an inadequate solution. For slopes where the variance across the bed footprint exceeds 6 inches, consider splitting your planned footprint into two separate beds arranged as a stair-step terrace rather than one large level bed. This distributes the engineering challenge and often results in a more visually attractive, practical garden design. Anleolife’s modular raised garden bed configurations are well-suited to this kind of adaptive arrangement.
Handling Soft or Waterlogged Soil
Soft, waterlogged soil presents a special challenge because compacted fill material can settle significantly after wet weather. In these situations, it’s worth digging down to find more stable subsoil or using a gravel base of greater depth—sometimes 8 inches or more—before placing your bed frame. Adding a layer of coarse sand between native soil and gravel also improves load-bearing stability in high-moisture environments.
The Most Common Leveling Misconception: “Close Enough” Is Enough
Many first-time raised bed gardeners assume that a slight tilt—say, half an inch across an 8-foot bed—is negligible. In the first season, it often is. But over time, that small variance concentrates water runoff consistently to one end, causes uneven soil settling, and places chronic one-sided stress on the bed’s frame joints. Over the 20-year lifespan of a well-built bed like those in Anleolife’s lineup, the cumulative effect of even a modest tilt can be significant. Taking an extra 30 minutes to get truly level at installation pays dividends for years.
After Leveling: What Comes Next
Once your bed is level, secure it appropriately. Drive included stakes or anchoring hardware into the ground at the corners and along long sides to prevent frame movement during soil expansion from watering. Add landscape fabric or hardware cloth to the base if pest pressure is a concern in your area. Fill with your chosen soil mix in stages rather than all at once, pausing to check level after each major addition. Soil weight can shift a frame on freshly prepared ground if added too quickly.
Frequently Asked Questions FAQ
Q1: How do I know if my raised garden bed is level enough before filling it with soil?
Use a 4-foot or longer carpenter’s level laid across the top rail of your bed in multiple directions—along both long sides, both short sides, and diagonally corner to corner. A reading within 1/8 inch across the full length of the bed is generally considered level for garden purposes. If you’re working with a longer bed (8 feet or more), use a line level and string stretched taut across the corners for more accurate measurement over a greater distance. Always check in at least three directions to detect any twist or warp in the frame placement.
Q2: Is it necessary to remove grass and weeds before installing a raised garden bed on uneven ground?
Yes, removing existing vegetation before leveling and installation is strongly recommended. Grass and weeds left under a raised bed will decompose unevenly, causing settling that disrupts your level surface over time. They can also push through into your bed. Either remove vegetation manually with a sod cutter, smother it with cardboard (the lasagna gardening method) well in advance of installation, or use a non-residual herbicide according to label instructions. Cardboard smothering is the preferred eco-friendly approach and aligns well with the values of most health-oriented home growers.
Q3: How long does it take to properly level ground for a raised garden bed, and how much does it cost?
For a standard 8×4 raised bed on a gentle slope, budget approximately 2–4 hours for site preparation and leveling using the cut-and-fill or gravel base method. Material costs are typically low—primarily gravel (if using), landscape fabric, and any additional fill dirt needed, usually totaling $20–$60 depending on your local market and the severity of the slope. More dramatic terrain corrections with retaining elements may take a full day and cost more. Investing this time and modest budget upfront protects a bed that’s built to last 20 years.
Summary
Leveling a raised garden bed on uneven ground isn’t glamorous work, but it is genuinely foundational work that determines how well your garden performs for years to come. Getting it right comes down to three core principles.
First, assess before you act. Measure your slope carefully across the full footprint of your planned bed before committing to a leveling strategy. A small variance calls for a different solution than a significant grade change, and knowing the difference saves time and effort.
Second, choose the right method for your terrain. The cut-and-fill method is efficient for mild slopes, the gravel base method excels where drainage is also a concern, and the stacked frame or riser approach handles more dramatic terrain beautifully. Don’t try to force one method onto terrain that calls for another.
Third, prioritize true level, not close enough. Taking the time to achieve genuine level at installation—checking in multiple directions, compacting fill material properly, and anchoring the frame before filling—protects both the structural integrity of your bed and the health of your plants over the long growing seasons ahead.
Your raised garden bed is an investment in fresh food, outdoor wellbeing, and the quality of your home environment. Give it the foundation it deserves.
Start Growing with Confidence — Anleolife Has You Covered
Nationwide U.S. warehouse network: Strategically located in California, Texas, Florida, New York, Illinois, and Washington to ensure delivery within 3–8 business days—so your garden upgrade plans never have to wait.
Multi-channel sales network: Products are available on major e-commerce platforms including Amazon, Walmart, Home Depot, Lowe’s, and Wayfair, as well as the official website Anleolife.com, providing consistent quality assurance and after-sales service.
Three core scenarios: Planting (metal raised garden beds, soil systems), Raising (chicken coops, rabbit hutches), and Beautification (decorative accessories, pathway systems)—meeting complete needs from functionality to aesthetics.
Upgrade your garden with Anleolife. We understand that an ideal garden is not built overnight, but gradually improved over time. Our modular product design allows flexible expansion based on your needs—from your first raised garden bed to a fully integrated planting-and-raising ecosystem. We grow with you every step of the way.
References
- University of California Cooperative Extension. “Building Raised Bed Gardens”.
https://ucanr.edu/sites/MarinMG/files/303388.pdf - Oregon State University Extension Service. “Raised Bed Gardening”.
https://extension.oregonstate.edu/gardening/techniques/raised-bed-gardening - University of Minnesota Extension. “Raised Bed Gardening for Vegetables”.
https://extension.umn.edu/how/raised-bed-gardening - National Gardening Association. “Raised Bed Gardening Guide”.
https://garden.org/learn/articles/view/318/ - Penn State Extension. “Site Selection and Preparation for Home Gardens”.
https://extension.psu.edu/site-selection-and-preparation-for-home-gardens
Note: Standards and best practices may be updated over time. Please check the latest official documents or consult professional advisors for the most current guidance.
About Anleolife
Anleolife is a leading outdoor garden solutions provider in North America, dedicated to offering a full-scenario product ecosystem for home gardening enthusiasts, covering planting, raising, and garden beautification. Since its founding, we have upheld our brand mission, “Made for Garden Life,” continuously innovating products and optimizing services to help hundreds of thousands of users upgrade their gardens, reconnect with nature, and enjoy a better garden lifestyle.
发表回复